Using E-mail Services
Creating Mailboxes
If you wish to have an e-mail address associated with your site, like yourname@your-domain.com, you should create a mailbox.
1. Go to Home > Create Mail Account.
2. Your domain name is shown to the right of @ sign, so you only need to specify the desired name for the mailbox.
This can be, for example, your first name and last name separated by a dot, a department name, or any other text in Latin symbols. The name should be short enough to remember. It can comprise alphanumeric, dash, dot and underscore symbols.
3. Specify a password that you will use for accessing your mailbox.
4. Make sure that a check mark is present in the Mailbox check box.
5. Click OK.
Now your mailbox is created on the provider’s server, and you can set up your favorite e-mail program so as to receive and send e-mail messages through your new mailbox.
To create mailboxes for other users:
1. Go to Home > Create Mail Account.
2. Your domain name is shown to the right of @ sign, so you only need to specify the desired name for the mailbox.
This can be, for example, user’s first name and last name separated by a dot, a department name, or any other text in Latin symbols. The name should be short enough to remember. It can comprise alphanumeric, dash dot and underscore symbols.
3. Specify a password that mailbox owner will use for accessing his or her mailbox.
4. Specify the settings related to the appearance of user's control panel, if desired: interface language, theme (skin), the limit on number of characters that can appear on custom buttons placed into the control panel by the mailbox owner.
5. Leave the Allow multiple sessions check box selected to allow the mailbox owner to have several simultaneous sessions in the control panel.
6. Leave the Prevent users from working with the control panel until interface screens are completely loaded check box selected.
This will forbid users from submitting data or performing operations until the control panel is ready to accept them.
7. Make sure that a check mark is present in the Mailbox check box.
8. If required, limit the amount of disk space that this mailbox and it's autoresponder attachment files can use. To do this, under Mailbox quota select the Enter size option and type the desired value in kilobytes.
9. Click OK.
10. To allow the mailbox owner configure and use spam filter and antivirus, click Permissions, select the respective check boxes and click OK.
Now, the mailbox is created, and a separate e-mail administration panel has been set up in Parallels Plesk Panel. To enter it, the mailbox owner should visit the URL https://webmail.caprishosting.com:8443, type his or her e-mail address into the Login box, type the password for the mailbox into the Password box, and then click Login.
Accessing Your Mail
- Set up and use an e-mail client program on your computer.
- Use a Web browser to connect to the webmail interface.
To enable access to the webmail interface:
1. Go to Home > Mail group title menu > Mail Settings.
2. From the Webmail menu, select the webmail program that you want to use.
3. Click OK.
In this section:
- Setting Up Microsoft Office Outlook 2007
- Setting Up Microsoft Outlook Express 6
- Setting Up Mozilla Thunderbird
- Setting Up Apple Mail
Setting up Microsoft Office Outlook 2007
To set up Microsoft Office Outlook 2007:
1. Open Microsoft Office Outlook.
2. Go to Tools > Account Settings.
3. On the E-mail tab, click New.
4. Leave the option Microsoft Exchange, POP3, IMAP, or HTTP selected. Click Next.
5. Select the check box Manually configure server settings or additional server types. Click Next.
6. Select the Internet E-mail option and click Next.
7. Specify the following:
· Your name.
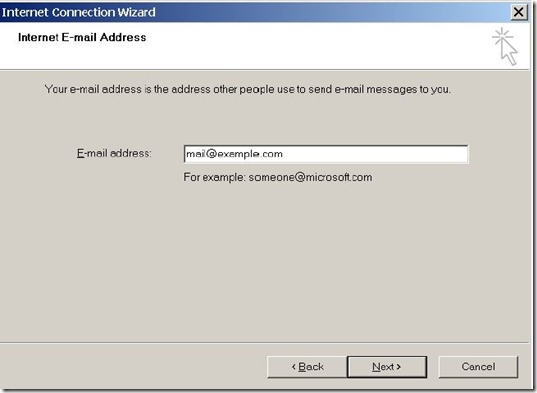
· Your e-mail address.
Account type. If you want to keep copies of messages on the server, select the IMAP option. If you do not want to keep any messages on the server, select the POP3 option.
· Incoming mail server. Type mail.caprishosting.com
· Outgoing mail server. Type mail.caprishosting.com
· Username for logging in to the mailbox. Specify your full e-mail address.
· Password for logging in to the mailbox. Most likely, this password coincides with the password you use for logging in to the Panel.
8. Click Next.
9. Click Finish.
To set up Microsoft Outlook Express:
1. Open Microsoft Outlook Express.
2. Go to Tools > Accounts.
3. Click the Add button and select the Mail item.
4. Enter your name as you want it to appear in any messages you send, and click Next.
5. Type your e-mail address, and click Next.
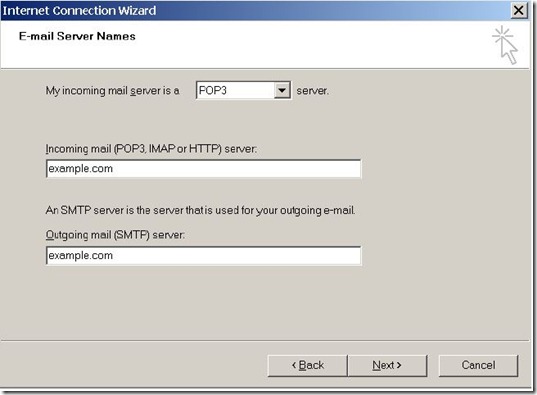
6. Specify the following settings:
· Protocol of your incoming mail server.
If you want to keep copies of messages on the server, select the IMAP option. If you do not want to keep any messages on the server, select the POP3 option.
· Incoming mail server. Type: mail.caprishosting.com.
· Outgoing mail server. Type: mail.caprishosting.com.
7. Click Next.
8. Specify the following:
§ Your account name. Type your e-mail address in the Account name box.
§ Your password. Most likely, this password coincides with the password you use for logging in to the Panel.
§ Remember password check box. Leave it selected if you do not want to be prompted to enter password each time your e-mail program connects to the mail server to check for new mail, and click Next.
9. To complete setting up your e-mail program, click Finish
To set up Mozilla Thunderbird:
1. Open Mozilla Thunderbird.
2. Go to Tools > Account Settings.
3. Click Add Account.
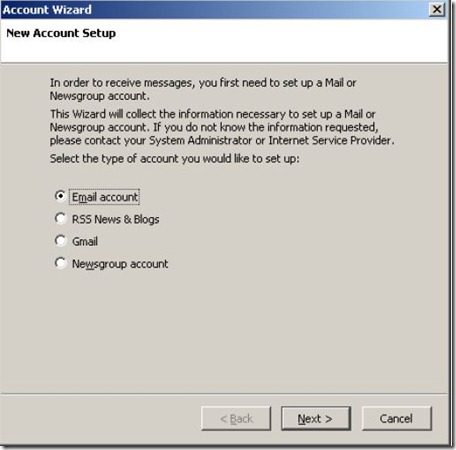
The Account Wizard opens.
4. Leave the Email account option selected, and click Next.
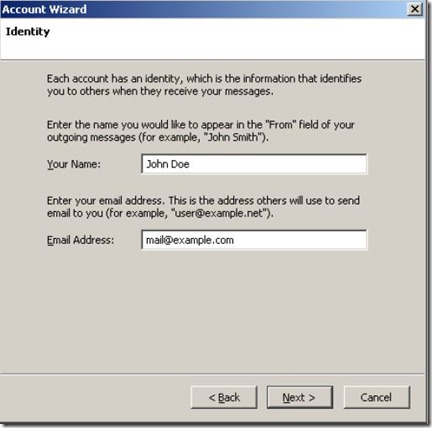
5. Specify the following:
- Your name, as you want it to appear in any messages you send.
- Your e-mail address.
6. Click Next.
7. Specify the following:
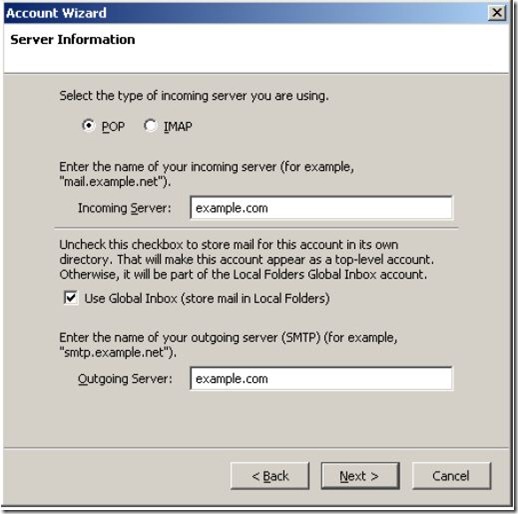
- Protocol of your incoming mail server.
If you want to keep copies of messages on the server, select the IMAP option. If you do not want to keep any messages on the server, select the POP3 option.
- Incoming server address. Type : mail.caprishosting.com.
- Outgoing server address. Type : mail.caprishosting.com.
8. Click Next.
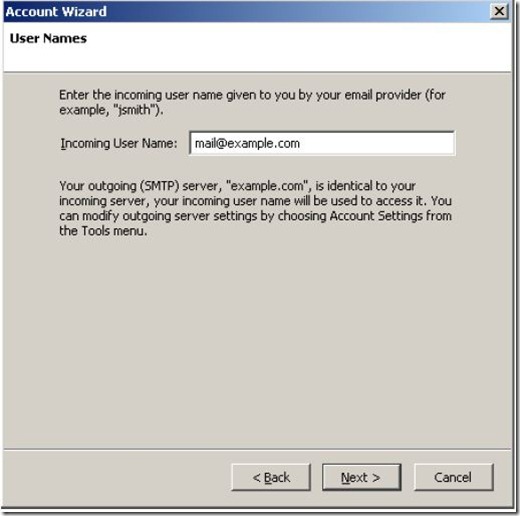
9. In the Incoming User Name box, specify your full e-mail address.
10. Click Next.
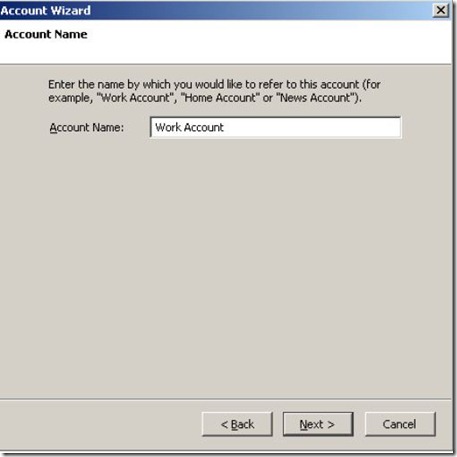
11. Enter the name by which you would like to refer to this account (for example, Work Account) and click Next.
12. Verify that the information you entered is correct, and click Finish.
13. Click OK to close the Account Settings wizard.
To set up Apple Mail:
1. Run Apple Mail.
If you run it for the first time and do not have any mail accounts configured in it, skip the next step: Apple Mail will take you directly to creating one.
2. Open the Adding Mail Account wizard:
a. Click Mail > Preferences....
b. Select the Accounts tab.
c. Click the + button at the bottom left corner.
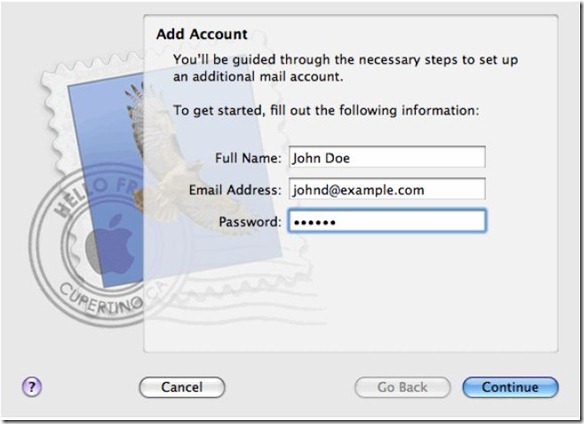
3. Enter the account information:
- Your full name
- Your full e-mail address
- The password you use to log in to the Panel.
4. Click Continue.
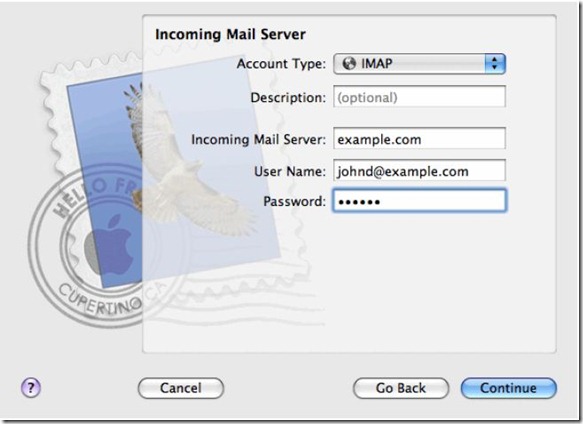
5. Fill in the following incoming mail server information:
§ Account Type: select whether you want to use IMAP or POP protocol. Selecting IMAP lets you keep messages on the server.
§ Incoming Mail Server: type mail.caprishosting.com
§ User Name: enter your full e-mail address.
§ Password: leave it auto-completed (Apple Mail takes it from the previous step).
6. Click Continue.
7. Specify the incoming mail security options:
a. clear the Use Secure Sockets Layer (SSL) check box.
8. Click Continue.
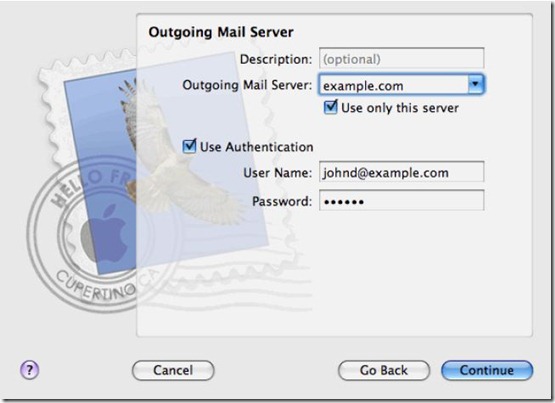
9. Fill in the following outgoing mail server information:
- Outgoing Mail Server: type in the name of domain which serves your mail (which follows the @ sign in your e-mail address).
- Use only this server: selected.
- Use Authentication: selected.
- User Name: enter your full e-mail address.
- Password: leave it auto-completed (Apple Mail takes it from the previous step).
10. Click Continue.
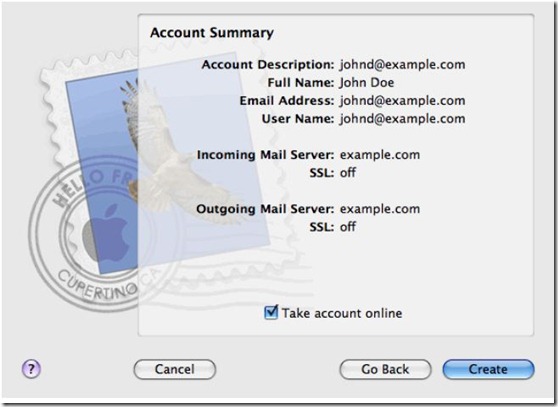
Apple Mail displays overall description of the mail account that is going to be created.
11. Select the Take account online check box and click Create.
Setting Up Mail Forwarding to a Single Email Address
To set up an e-mail address that will accept mail and forward it to another e-mail address:
1. Go to Home > Create Redirect.
2. Select an e-mail address that you would like to turn into a mail
forwarder, or click Add New Mail Account to set up new e-mail address.
3. Click Next >>.
The domain name is shown to the right of @ sign, so you only need to type the
name. This can be, for example, your first name and last name separated by a dot,
a department name, or any other text in Latin symbols. The name should be short
enough to remember. It can comprise alphanumeric, dash, dot, and underscore
symbols.
4. Select the Redirect check box and type the destination e-mail address to
which you would like to forward e-mail.
5. Click Finish.
Setting Up Mail Forwarding to Multiple Email Addresses
To set up an e-mail address that will accept mail and forward it to multiple other e-mail addresses:
1. Go to Home > Mail Accounts > e-mail address > Mail Group.
2. Click Add New Member.
You should add at least one e-mail address before enabling mail forwarding to
several e-mail addresses.
3. Enter the desired external e-mail address into the E-mail input box or select one or more of the listed mail accounts using check boxes.
4. Click OK.
5. Click Switch On.


